Introduction
Capture Your First Page
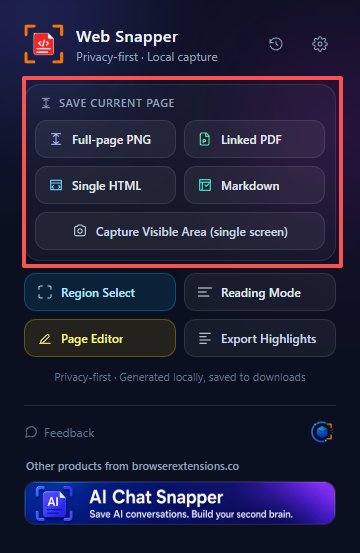
Capture your first page with Web Snapper — open a page, click the icon, pick a mode and format, and save it as a screenshot, PDF, HTML, or Markdown.
Once Web Snapper is installed and pinned, saving a page takes just a few clicks. Here's the fastest path from a web page to a file you own.
Capture a page
- Open the page you want to keep.
- Click the Web Snapper icon in your toolbar.
- Choose a capture mode — full page, a region you drag to select, the visible area, or inner-scroll.
- Pick an export format — searchable PDF, single-file HTML, Markdown, or PNG.
- Save.
That's it. For a long, scrolling article, full page plus searchable PDF is a great default — you get the entire page in one file, with text you can still select and search.
Where your capture goes
Web Snapper saves the finished file to your Downloads folder, just like any other download. The same capture is also added to your local history, an on-device archive with a thumbnail and full-text search so you can find it again later — even if you forget the file name.
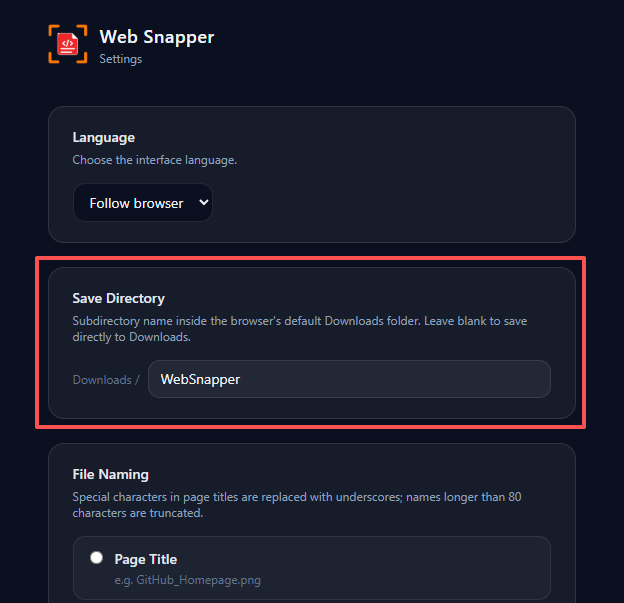
Nothing leaves your device at any point — the capture, the file, and the history index all stay local.
Want to mark it up first?
Before you save, you can highlight, annotate, and redact the page in Web Snapper's on-page editor. Anything you add — highlights, notes, arrows, or blacked-out sections — is baked into the export, whether you save as PNG, PDF, HTML, or Markdown.
What's next
- See the full feature set in Getting Started.
- Review the privacy details on the privacy page.